Last Updated on June 4, 2024 by cokdesurya
Local Area Network (LAN) Installation is a network setup step that is used to organize, connect, and administer devices in a computer network located in a limited area such as an office building, school, or home. This topology determines how devices such as computers, printers, and servers connect and communicate with each other.
Background
There are several reasons behind the installation of a Local Area Network (LAN) network, namely related to the need to increase efficiency, productivity and security of network access in the work environment, here are the objectives:
- To get stable & high internet speed compared to using wireless which will be more frequently affected by interference, especially distance.
- Makes it easier to communicate and share data between computers, especially for data with a fairly large size.
- It makes it easier to secure the network because it is within a smaller and more controlled network scope.
- Network problems can be diagnosed and repaired more efficiently in a LAN compared to larger, more complex networks.
Experience
I was given the opportunity by management to organize all matters related to network installation, starting from creating an idea for a network topology description, the needs and equipment needed to install a Local Area Network (LAN) network. Apart from that, this is also very useful for me to be able to learn more about networking and gain experience in this field.
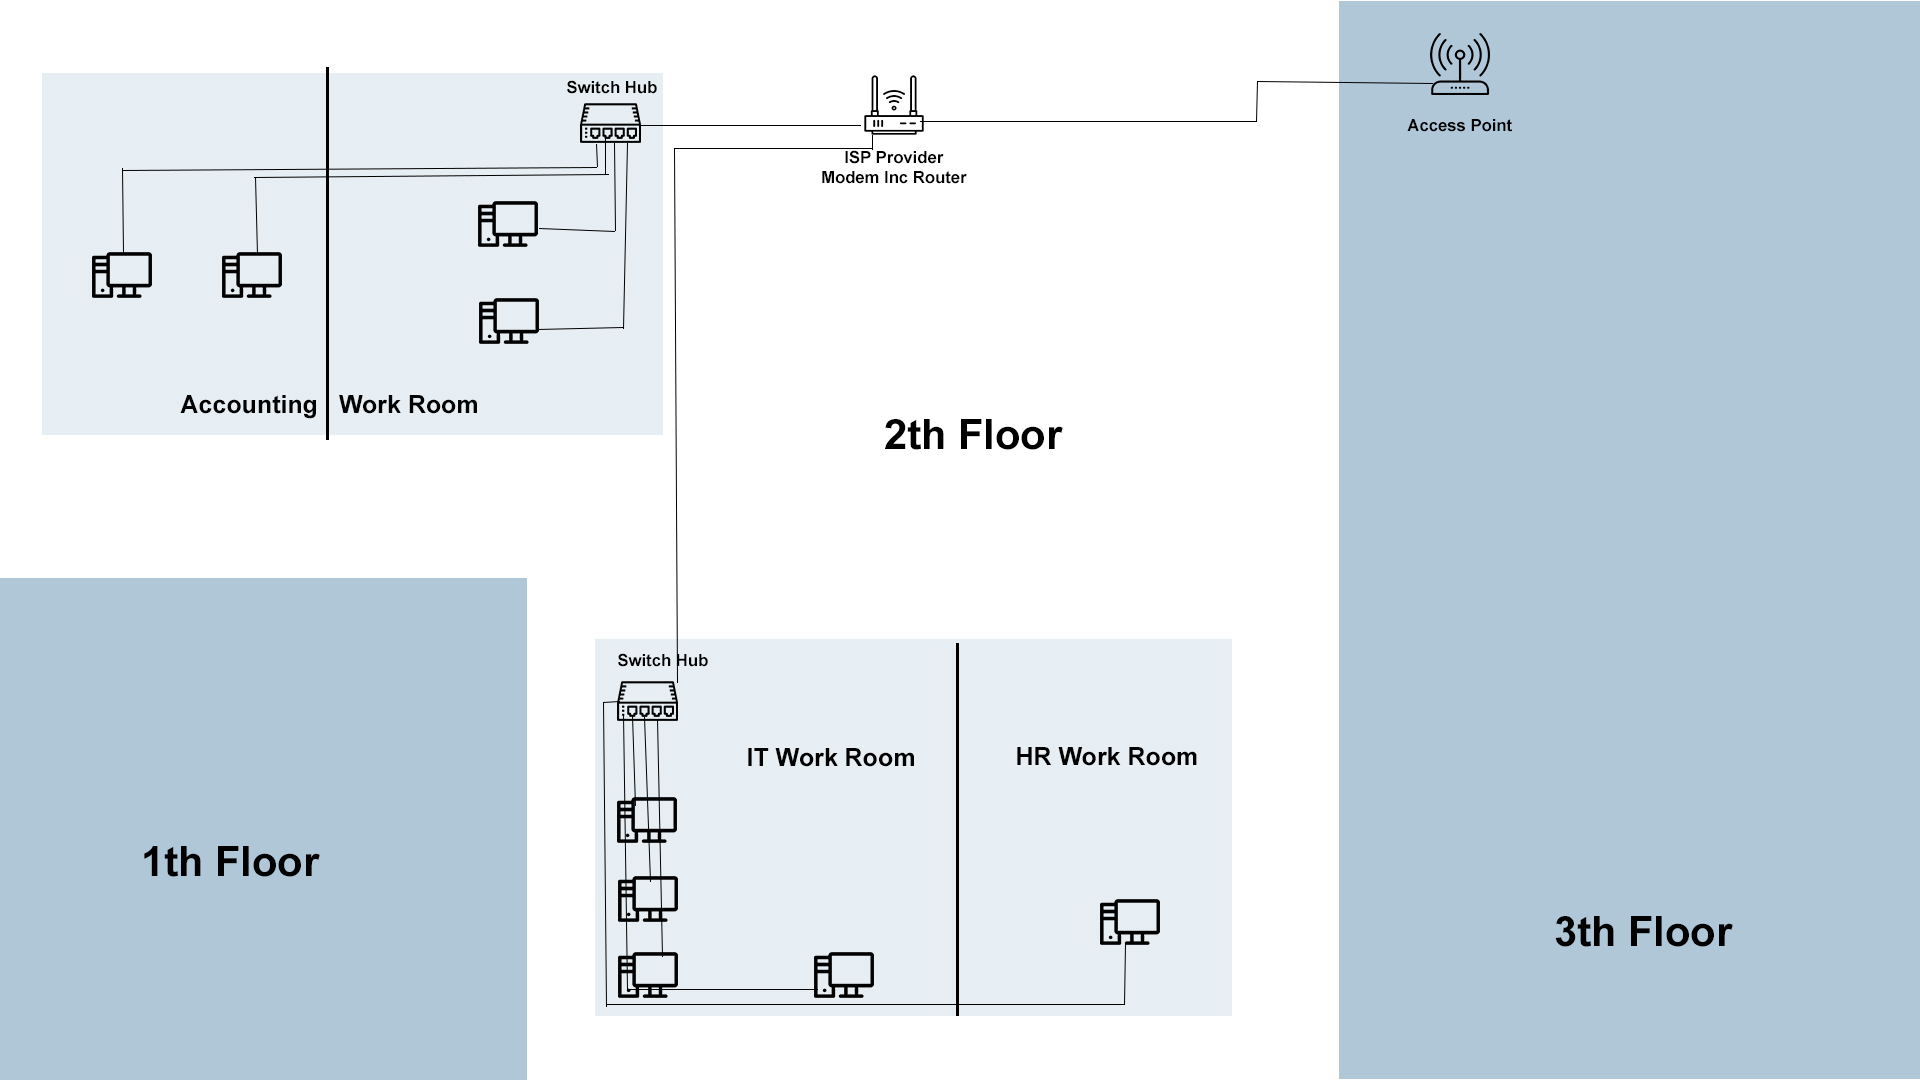
Network Topology Design to be Implemented
Some Equipment Required
- RJ45 Connector
- UTP CAT6 Cable
- LAN Card Komputer
- Crimping Pliers
- LAN Tester
- Router
- Access Point
- Switch HUB
- Duck Cable


Task Performed:
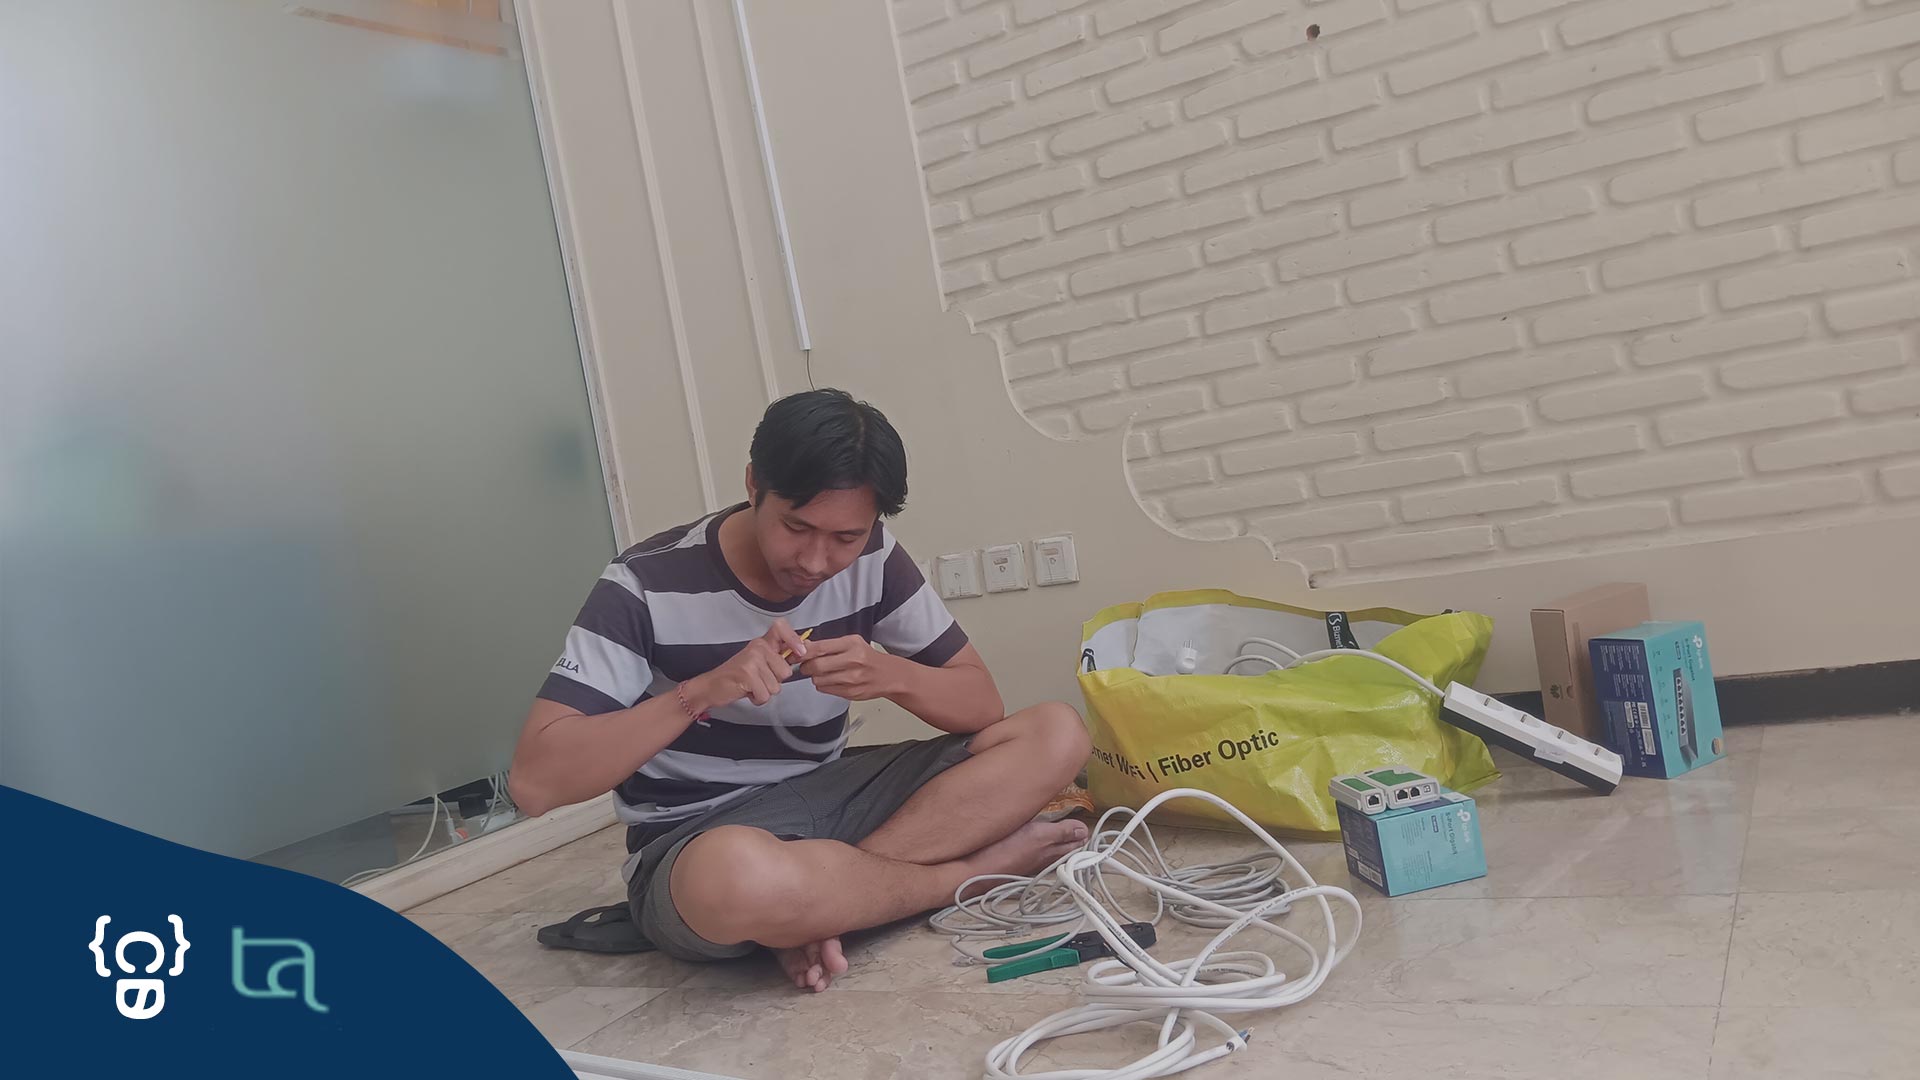
- Carry out planning, starting from the Network Provider Modem placement point, determining the HUB Switch placement point, and measuring the distance of the UTP cable to each placement point.
- Make LAN network cables using the Straight version (TIA/EIA-568B) for both ends of the RJ45 connector as standard in the network.
- Carry out testing using a LAN Tester on each cable unit that has been made to ensure whether all the colors on the UTP cable are active or not on the LAN Tester indicator.
- Place each HUB Switch at predetermined points.
- Installation of LAN network cables from Modem Provider & Router to each HUB Switch.
- Installation of a LAN network cable from the Switch HUB to each computer for internet access.
- Tidy up the LAN network cable lines with Duck Cable.
- Setup Static IP network configuration on each computer and setup folder sharing.